Employee LINQ Admin Steps
Before employees register for Employee LINQ, administrators must complete the following steps:
Step 1
In order for clocking in and out to be activated, the Allow Lump Sum Worked Hours Entry check box must NOT be checked on the employee’s pay group in Payroll > Administration > Pay Group Setup > Details tab.
Step 2
Complete the EmployeLINQ Setup tabs in System Settings:
- Manage general settings and clock in/out IP restrictions from the General Info tab.
- Add, delete, and manage Timesheet Approval Groups from the TS Approval Groups tab. Timesheet Approval Groups are optional but are used to help control who can approve each employee's timesheet and help manage the approval process for timesheets and requests.
- Identify which request types will be available for employees to use in submitting requests from the Request Setup tab.
Step 3
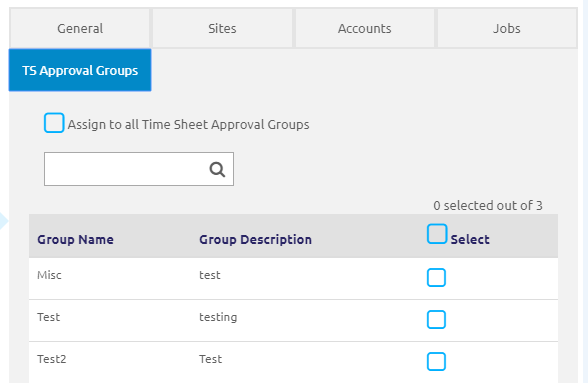
If you are using Timesheet Approval Groups, become familiar with the TS Approval Groups tab in System Settings > User Management > Users. This tab allows you to assign specific administrators to all or some of the Timesheet Approval Groups set up in Step 1.

Step 4
Complete the Details Tab in Payroll > Administration > Job Setup.
- If employees will be required to clock in and out, check the Allow Clocking-in and Allow Clocking-out boxes. You can allow employees to just clock in if you are using Employee LINQ for attendance rather than hours worked, e.g., if your employees are salary.
- If employee timesheets need to be approved only by certain individuals, select a Timesheet Approval Group from the Timesheet Approval Group drop-down list.
-
If there may be instances where employees need to be able to clock in or out from anywhere, check the Ignore IP Address Restrictions for Clocking In/Out box. Example: If a bus driver arrives too early to get in the building (inside the IP restrictions) and needs to clock in from the bus in the parking lot.
NOTE: When these options are selected in Job Setup, if any employees have that job, you will receive a message asking if you want to apply those settings to all the employees with that job. If you choose to do so, Step 3 will not be necessary, but these settings can still be edited on the individual employee job level.

Step 5
Complete the Jobs Tab in Payroll > Manage Employees.
- If employees will be required to clock in and out, check the Allow Clocking-in and Allow Clocking-out boxes.
- If employee timesheets need to be approved only by certain individuals, select a Timesheet Approval Group from the Timesheet Approval Group drop-down list.
Once these settings are applied to the employee job, clocking in and out will be available in Employee LINQ.
Step 6
Provide employees with the link to be able to create their accounts. Instructions on how to register can be accessed from the Employee LINQ log in page.
©2021 | EMS LINQ, Inc.
School LINQ Help, updated 01/2021